We've had our dining room table since the heyday of oak dining sets...at least 20 years ago. We bought it because of its very simple, solid style and the set has held up very well. Except for the chair cushions. I've hand-cleaned the cushions more times than I can count, but finally decided it was time to reupholster them. Six chairs with seat cushion only...how hard could that be?
Original chair cushion
I did some online research to determine how much material to order, but decided to take apart one cushion to compare actual dimensions of the cushion material to the calculated dimensions that were recommended online. As I took apart the cushion, I noted how the corners were constructed so I could duplicate it as much as possible.
Original corner construction
Material from old cushion
In the end, I used dimensions a little larger than the actual dimensions, but not as large as the calculated dimensions. If I had gone strictly with the calculations, only one cushion would have fit on the width of the material I chose rather than two, which would have necessitating buying twice as much material. Not gonna happen!
I marked each cushion and chair to make sure each cushion would be reinstalled in the exact chair it came from. (They are all the same size, but have different screw attachment patterns) I then used an industrial staple remover and a pair of pliers to remove the old material from each cushion. I was able to reuse the main seat cushions, but could not reuse the thinner cushion pieces (protects hard seat corners and front edge) since they were sewn directly onto the old fabric to create the seamed cushion. Instead, I purchased new foam the same thickness of the unusable foam pieces.
Over 300 staples PER CHAIR (x 6!)
Using the dimensions for the new cushion, I made a pattern out of newspaper. I pinned the pattern to the folded material and was able to cut two pieces of material at once. Remembering the old adage of "measure twice, cut once", I measured and remeasured each piece before I made any cuts. A friend lent me her cutting mat and rotary cutter, which made the job extremely easy.
Rotary cutter and cutting mat
Stapler and staple removal tool
After all materials were cut, I began reassembly. I marked the center lines front and back of the seat bottom, old cushion piece, new cushion piece and underside & top of the new fabric. Other marks on seat bottom point out screw attachment points so I could try to avoid staples on those specific spots.
Layout of new materials
I used an electric stapler, and began by stapling center front with a few towards the corners, center back with a few staples towards the corners, then stapled each side from center point to corners. Use just a few staples at this time to hold the material in place securely. Pull the material as tightly as you can, but leave enough material free at the corners to fold a clean, flat corner. Make sure your corners are all aligned the same, i.e., front-to-back or side-to-side, and the same for every chair. After the corners were done, I added more staples to make sure all the material lay nice and flat and secure. In some cases, I removed a few staples to pull the material tighter and stapled again. Turn the cushion over and make sure you don't see any puckered or loose areas. If so, either add additional staples or pull material tighter and re-staple.
In the end, I purchased 3 yd. of 54" wide material, 5 yd. of 24" wide 1" nu-foam (placed atop old cushions), a box of 1000 staples, and the staple remover. Total cost for this project was about $125.
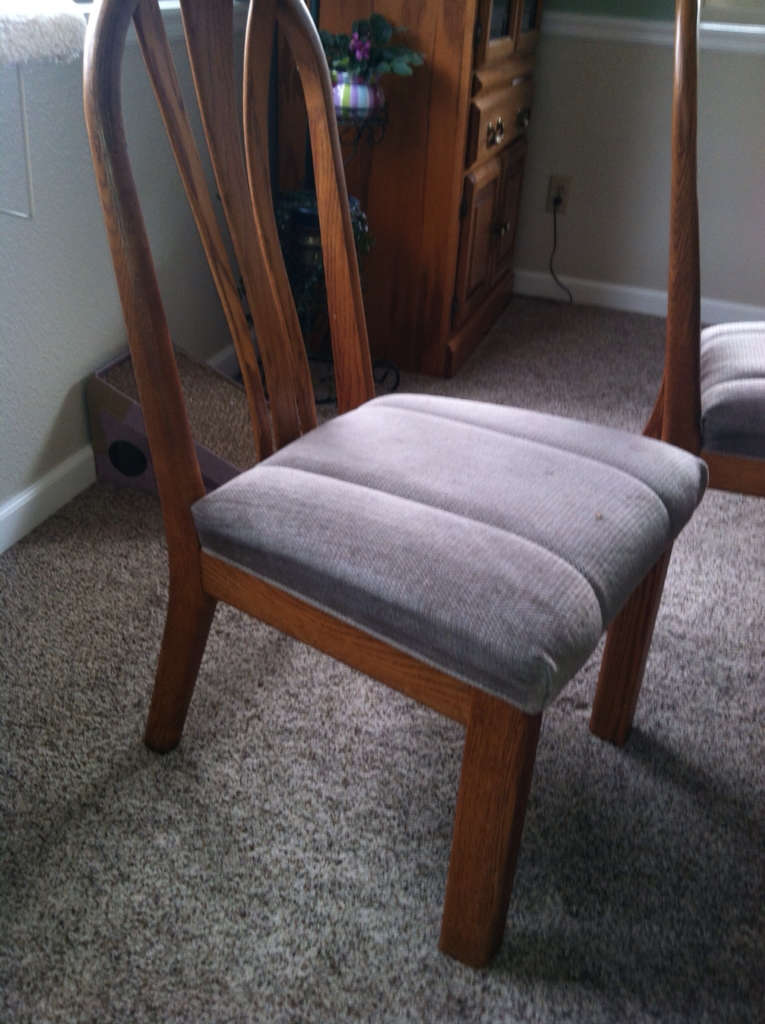
Here is the result:
Gorgeous!
Would I do it again? Definitely so! This project was a little more time-consuming than I thought since there were so many staples to remove. But I am extremely pleased with the end result, and love my "new" chairs.